How To Install PitchPrint On WordPress
WordPress is naturally a blogging platform but with a very large community of developers and user-base, it has expanded beyond just blogging. In fact, this wiki sits on a a WordPress engine.
So natively, WordPress is does not have a cart system but there are plugins that makes this possible. One of them is WooCommerce upon which PitchPrint is based. The WordPress version of PitchPrint module is designed to function alongside the WooCommerce module. So it cannot work without the WooCommerce plugin. Follow these steps to install WordPress, then WooCommerce and finally PitchPrint.
- Download and install WordPress: http://wordpress.org
-
After installing WordPress, login to your WordPress admin portal and install WooCommerce.
To do this, you can either install manually or install within the WordPress admin panel by searching for “WooCommerce” in the Plugins -> Add New -> and then search field.
Optionally, you can download it manually here: http://downloads.wordpress.org/plugin/woocommerce.zip and install manually if you so choose.
- Once, you have installed both WordPress and WooCommerce, you can then install PitchPrint through the same procedure as above. Search for “PitchPrint” in Plugins -> Add New -> and then type “PitchPrint” into the search field.
- Optionally, you can as well download and install it manually using this link: https://downloads.wordpress.org/plugin/pitchprint.11.0.11.zip
- Activate both the WooCommerce and PitchPrint plugins under Admin -> Plugins -> Installed Plugins.
- Next, let’s generate the PitchPrint keys. Navigate to https://admin.pitchprint.com/register and create an account or login here if you already have an account
- Then navigate to the domains page and add a new domain. Don’t worry you can still use it for localhost testing if you are not ready to go live yet. Provide your intended domain url, not a localhost. You should now have a pair of API and Secret Key.
-
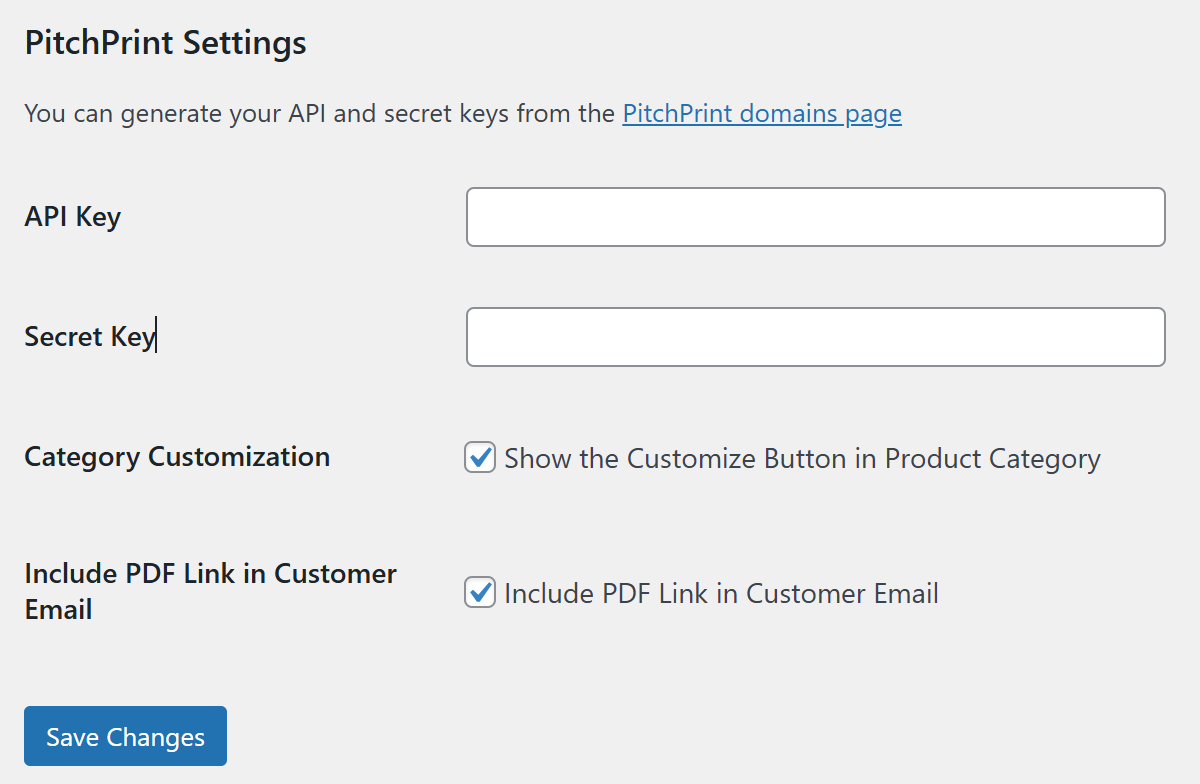
Back to your WordPress admin, you will find PitchPrint in the menu on the left. Click it to enter the keys generated above and save. You can omit the Custom Js-Script and Css fields for now.
- For uploads to work properly, you should set the permission of the folder wp-contents/plugins/pitchprint/upload/files to 777. After installation, please take some time to read and implement our security measures here.
-
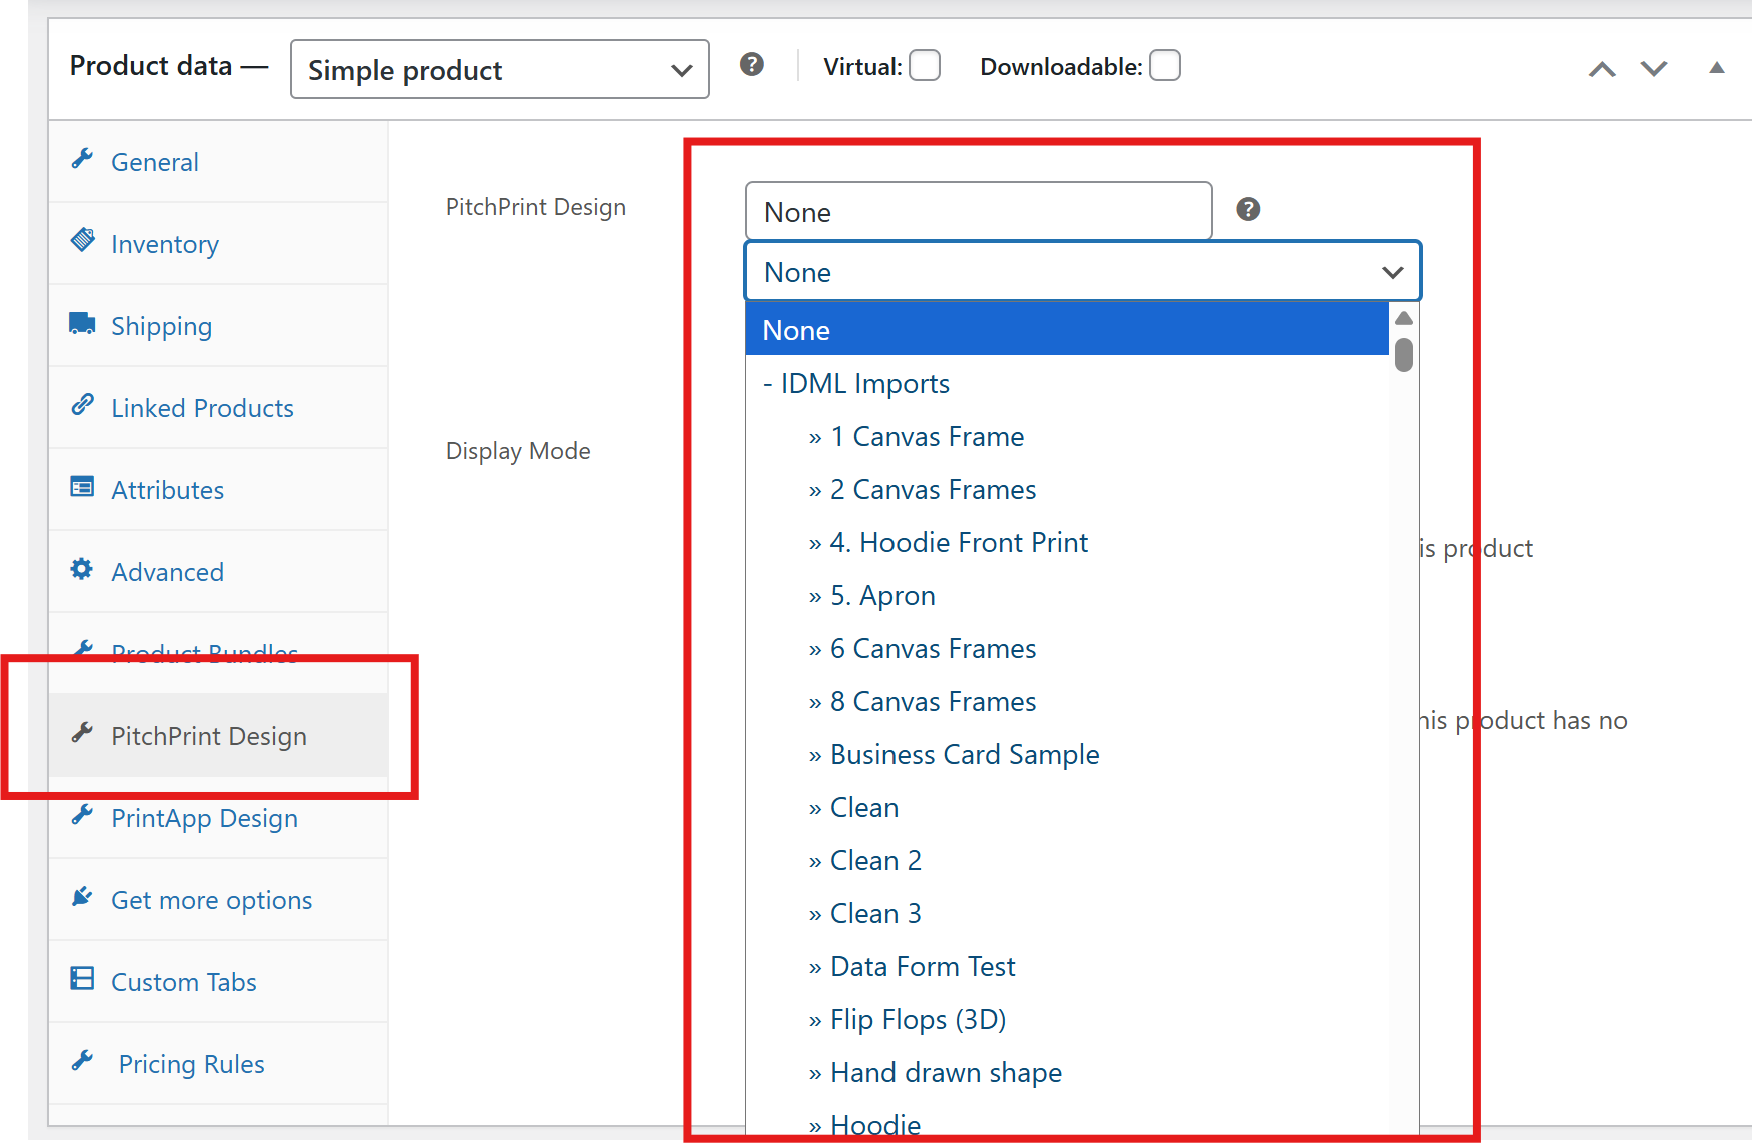
You can start by adding a new product to your store. Go to Products section in the admin and click the “Add Product” link. Provide an SKU, a price and then select the design you wish to assign to that product. The designs are fetched from your PitchPrint account using the Keys you provided earlier.
- Navigate to your store front and check the product has the Customize button. Please ensure you have a price set for the product; if not, the customize button will not show. If it still does not show, please read more on our trouble shooting page or send us a ticket.
- When an order is placed, you should find the design download links against each product in the order.

